Restoring a deleted topic from PHPBB.

To anyone who runs a forum based website, there will come a time when you accidentally delete, or a moderator will delete a topic that should not have been deleted.
This is devastating to a forum running on PHPBB since there is no “undo” or “trash can”, once it’s deleted, the posts/topic are dropped from the sql database, and the attachments (if any) are removed from the attachment directory. They are truly “gone”.

Now, lets assume you have server backups, as you should. Also, this is a complicated process and should only be done in extreme cases. (like when a 63 page topic with 942 posts gets accidentally deleted by a moderator)

The requirements:
First, you’ll need the sql database backup, if there were any attachments with the topic, you’ll need a web file backup as well.
Second, you’ll need to know the ID of the topic you’re trying to restore. Let’s say for example the topic_id was 26446.
Third, you’ll need either a empty database and/or a virtual environment.

Lets begin:
1. Extract your sql backup into an empty database. I’ll be using phpmyadmin for this example.
2. Go to search, enter your ID number as the search value, exact match, select all tables, and specify “topic_id” for the inside field.
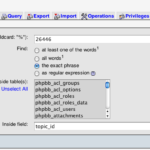
3. This will return a result that looks like this:
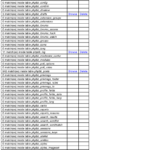
3. There are only a few tables here that are required: “phpbb_attachments”(if you have any), “phpbb_posts”, and “phpbb_topics”. Click browse on each of these, being sure to open them in a new tab/window.
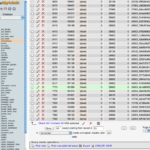
4. At the bottom of each browse window is a “Export” link, click that, you’ll get a screen like this:
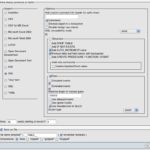
UNCHECK THE STRUCTURE BOX! You just want the data. You also want to save this as a file. Repeat these steps with the two other tables.
5. Now switch over to your live/production database, go to the “Import” tab, and upload the 3 files to it.
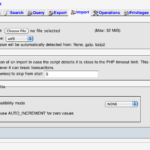
Assuming there are no import errors, you’re done importing the sql data! The restored topic should be visible and functional again, the only thing missing at the moment should be attachments.

Now lets assume you have attachments, as a good portion of topics do:

1. Open the phpbb_attachments sql file that we made in step 4 with a text editor.

2. I know this looks crazy, but trust me, it’s easier then you think. All we care about is the large random string in the middle: “32106_0ffb39ce936e4c0b5237c01859df9041” This is the “image” after phpbb converts it.
3. Open your web file backup to the directory where attachments are stored, and search for the string. You should get something like this:

4. FTP the file, and the thumb file (if it exists) to your live/production attachment file directory. Repeat for each file in the phpbb_attachment table.

THAT’S IT! Thank god it’s over… Be more careful next time!

Using iStat to monitor your linux web servers.

For those of you with a Mac or an iPhone, you may be familiar with a program called “iStat”. iStat is a program that lets you monitor system resources either locally or remotely with the iPhone app. For some time, the Mac has been the only release platform, but thanks to the work of William Tisater, an open source version has been released for Linux.

It’s fairly simple to install once you have the necessary requirements:

1. Make sure you buy the iphone app.
2. SSH into your linux server and “cd” into the directory of your choice, /home/yourusername
3. Do a wget for the tar.gz linux server app.
4. Unzip it, tar -zxvf filename
5. cd into the new directory, and run the configure script. ./configure
This is probably where you will run into some errors. You will probably get a C++ compiler error, if that’s the case, do yum install gcc-c++. Once it installs, run ./configure again, if you get a xml2 error, you will need to do yum install libxml2-devel. That should take care of the requirements on most servers, if you’re still having dependency errors, just look them up and install the appropriate package with yum.
6. Assuming it configured without error, run make, followed by make install.
7. Once it’s installed, you will want to edit the config file, it’s located in /usr/local/etc/istat.conf

In this file are some important lines, such as:

  • server_code: this is your “password” to log in
  • monitor_net: this is your network interface you want it to monitor
  • monitor_disk: this is your hdd(s) you want it to monitor

8. Once you have made the changes to the conf file, you can launch the server by running /usr/bin/istatd -d
9. That’s it! Most likely you will want the istat server to auto load if the server is restarted, if that’s the case, then just add /usr/bin/istatd -d, or more simply istatd -d to your /etc/rc.local file.

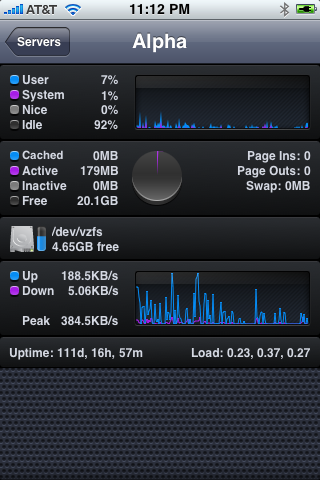
Here’s what it looks like when it’s all said and done. The RAM usage is not correct in this screen shot since it’s on a virtual dedicated server.

Why Hard Drive Upgrades are Important

You may think Hard Drives are all the same, and that there is no reason to upgrade unless you need more space, however that is NOT the case. Drives are getting faster and faster all the time, with more and more cache.
Take for example this mac mini with the standard 5400 RPM Hitachi Laptop Drive, it was replaced with a 7200 RPM Western Digital Black Drive. The drive benchmarks over 3 times higher, and the system has a dramatic performance boost.

Apple WWDC Here I Come!

Well, since I wasn’t accepted to go via the Student Scholarship program, I dove into my savings, and credit card, to finance the $1300 ticket. I’ll see you guys (and Robert) there!
its final!
WWDC $1300

Network+ Certified!

As of June 14th 2007, I am CompTIA Network+ Certified! This is an add-on to my A+ Certification which was on 8/2/05.